I discovered this wonderful meal service called Blue Apron. In a nutshell, a box arrives at your door each week, containing grocery items and recipes for three meals for two. The shopping is done for you, so all you have to do is to prep and cook the meals!
I'm on my second week and therefore the second box, and we love what we've eaten so far. I have taken a pictures of each dish and posted them on Instagram. You can take a look (and follow!) @dyangers, and let me know what you think.
Wednesday, December 18, 2013
Thursday, July 19, 2012
Creamy Polenta & Mushroom Sauce

Here's a meal inspired by Food Network's Best Thing I Ever Made. Scott Conant really sold me on his creamy polenta with fricassee of truffled mushrooms, which wasn't hard because I'm a sucker for mushrooms.
I tried following as close as possible his instructions to cook the polenta (coarse ground) for a long time, which turned out to be 2 hours and not the suggested 2 1/2 to 3 1/2 hours, mostly because I kept having to add liquid to thin out the mixture every time I opened the pot to stir. Perhaps I wasn't doing it correctly...? The result seemed a bit thick compared to his Scott's version. Maybe we'll have to visit his restaurant and try it out for ourselves to know what it should taste like.
As for the mushrooms, I made some changes. First, since I didn't have hours, the materials, and the patience to make the chicken stock, I used liquid beef stock in a tube. I also used a little mushroom stock made from stems of the mushrooms I used, which included honjimeshi, shitake, and baby bella. Next, I didn't get around to buying preserved truffles or truffle oil, so I just skipped that ingredient entirely. Last, because I can't get enough of it, I added about a half cup of ruby port in addition to the stock, which gave it a sweet profile. This might not be for you, but we loved it. I would have used more types of mushrooms but had to refrain from going overboard.
The other parts of the meal included a salad and garlic shrimp. The salad had roasted beets, tomatoes, blueberries, and mozzarella cheese balls with a balsamic/olive oil dressing--very light and refreshing. I like the pearl-sized ones since it's the perfect bite size so you can skip cutting up a large hunk of cheese. The other was quick and easy garlic shrimp, sauteed in olive oil. Start by heating garlic and a few chili pepper flakes until the garlic starts to get crispy brown, then add the shrimp. Be sure to pat the shrimp dry to get a good sear on the sides.
I am not sure I would make this (the polenta part) again, simply because of the labor versus the payoff (not kudos or any comment from the hubby). There was a mushroom rice dish that I made a few weeks ago that got a great reaction from him, so I am going to stick with that. My sister suggested crisping the leftover polenta on the skillet, like hash browns. I would, however, make that mushroom sauce to go with every thing I can think of.
Saturday, June 30, 2012
Easy Pie Dough
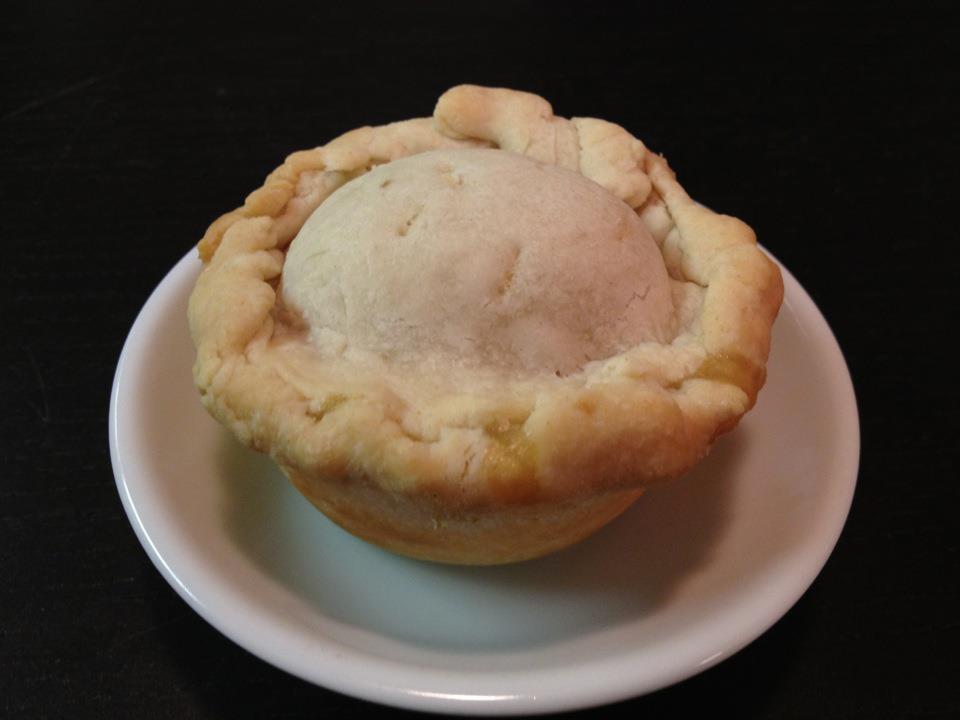
I only made half the portion, and yielded 3 mini chicken pot pies (in a muffin tin) using the filling ingredients from the previous post as well as 3.5 mac & cheese filled (yes, mac & cheese!) hand-held pies, which are kind of like hot pockets. Use about 2 tablespoons or an ice scream scoop of filling, otherwise over-stuffing can cause bubbling out and lead to burns. Be sure to cut slits on top to allow the steam to escape. Cook at 400 degrees for 15 minutes then turn the heat down to 375 or 350 for another 10-15 minutes.
These pies were made late in the evening, sometime after dinner, so I let them cool overnight. Today, I zapped one in the micro for about 30 seconds, long enough so the inside is piping hot and the crust still very flaky. We're heading over to my parents' today so I'll take both types of pies over to share.
Monday, June 18, 2012
Chicken Pot Pie Filling
This pie filling was much easier to make than I thought. To start, I go to my standby, the Costco roast chicken. I had already used most of it for other meals and had half the breast left, enough for two and then some. I removed the meat and used the carcass, skin, and any leftover drippings from the roast chicken to make a broth (about 4-5 cups of water in a medium sauce pan). This was the most time-consuming step of the whole process (30-40 minutes). To finish, strain any leftover bits from the broth and let it cool to remove the solidified fat. Now the whole chicken has been used and nothing has gone to waste.
To make the most of the chicken, I made a soup first before the filling. Add the shredded chicken meat, 2 cubes of Knorr vegetable bouillon, and about 1/2 cup of chopped cilantro and heat through. The cilantro makes the soup amazingly fragrant, but use with discretion, as some folks are averse to it.
Next is to make the pie filling. I didn't have any fresh veggies so ended up using a frozen medley of peas, corn, carrots and green beans, which worked just fine. Saute this in some butter until thawed. Add about 1 tbsp of flour (I used TJ's biscuit mix) to make a roux, stirring briskly until the flour is slightly browned, then add about 1/2 cup of the chicken broth, stirring to get a creamy consistency. Scoop in about a cup of the shredded chicken that's in the soup into this mixture. Finish off by adding the cream. This makes enough for 2 individual bowls of pie.
Here's a rundown of the ingredients:
4-5 cups water (for broth)
1/2 cup broth
1/2 cup chopped cilantro
2 cubes vegetable bouillon
1 cup frozen vegetable medley
1 cup shredded chicken breast
1 tbsp butter
1 tbsp flour
1/3 cup cream
The pie crust is still in progress... The crescent roll dough that I tried using did not cook evenly, so that was a bad idea. One other thing that I learned was to find some bowls with large enough lips to hold the crust up. I used casserole bowls with long handles, and the dough sagged into the filling. Someone let me know if you have a good suggestion for bowls. We did have plenty of chicken soup left to fill Ken's belly when the pie alone wasn't enough. There's still some soup left, so I'm thinking of modifying it to make chicken & dumplings.
Sunday, June 17, 2012
Thai Chicken (Turkey) Mint Leaves
This is one of my favorite Thai dishes to order and I never realized how easy it is to make until now. The ingredients are easy to find and were already in my kitchen & garden.
1 cup of seasoned ground turkey or chicken (see previous post)
1-2 cloves chopped garlic
1 handful mint leaves
1 red bell pepper, julienned
1/2 cup chicken stock (I like Better Than Bouillon)
3-4 tbsp sweet soy sauce
1 tbsp cooking oil
Head the cooking oil then add the red bell pepper and garlic, cooking until the pepper is slightly soft. Stir in the pre-cooked ground turkey and cook for about a minute. Pour in the stock and reduce the liquid to about half that amount before adding the sweet soy sauce. The last step is to add the mint leaves, cooking until wilted.
Ken thinks this tastes just like it came from the restaurant, which means it's a keeper. I like to have this mixture over steamed rice with an egg fried over easy on the side. The yolk from the fried egg pouring over the rice and the meat certainly puts this dish over the top.
Seasoned Ground Turkey Base
In my previous post about the turkey enchiladas, I cooked up the ground turkey before rolling up the enchiladas. I took that idea of pre-seasoning to creating a ground turkey base for a myriad of dishes, since I'm just cooking for 2, so we're not eating the same dish night after night. It's a simple and time-saving step that I wished I thought of doing sooner. All there is to it is browning the meat and adding some seasonings. Salt is left out and added later in other dishes to avoid over-salting. This could be used to make enchiladas, tacos, dirty rice, cupcake lasagna, spaghetti sauce, chili...whatever you can dream up. Give this a try!
1 package ground turkey - about 1 lb
1 tbsp onion powder
1 tbsp garlic powder
1 package ground turkey - about 1 lb
1 tbsp onion powder
1 tbsp garlic powder
Sunday, April 29, 2012
Ground Turkey Enchiladas & Dirty Rice
One catch of buying in bulk is figuring out different ways of
preparing the food. I came up with a quick and easy version of
enchiladas that turned out very tasty. In addition, I used the leftover
turkey that didn't make it into the enchiladas to make dirty rice,
which of course, goes great with the enchiladas and practically anything
else. Bear in mind, I'm cooking for two here so you'll have to adjust your quantities.
Seasoned Ground Turkey
1/2 package ground turkey
1/2 large onion, finely chopped
1/2 tsp ground cumin
1/2 tsp garlic powder
1/2 tsp onion powder
1/2 tsp salt
1/8 tsp anchou chili powder
Brown the ground turkey until thoroughly cooked through. Stir in the seasonings then add the onion and cook until translucent. Follow the enchilada sauce package instructions on building and cooking the enchiladas. My favorite sauce is from Frontera (of Rick Bayless). I roll a little bit of cheese inside each tortilla with the meat, and use less sprinkled on top over the whole casserole.
Dirty Rice
1/2 cup seasoned ground turkey
1 tsp chicken base (Better Than Bouillon)
1/4 large onion, finely chopped (leftover from the ground turkey)
2 cups cooked rice
1/4 cup water
1/4 tsp ground black pepper
Cook the onion until translucent, then add the seasoned ground turkey, water, and chicken base. Once the chicken base dissolves, add the rice. My rice had been in the refrigerator from a previous meal so I had to take care to break up the clumps, which was easily done once it had time to sit in the turkey mix. Stir in the ground pepper and cover until all the liquid is absorbed into the rice. I like to stir the rice a few times to be sure the rice doesn't overcook on the bottom. If you have any leftover rice, try topping it with an egg cooked over easy. Yumm...
Since I'm only cooking for two, I used the other half of the ground turkey package to roll into meatballs, which I'll post once we try them and only if they're any good!
Monday, October 10, 2011
Quick Braised Short Ribs with Gravy
This is a shorter, and even tastier, version of the braised short ribs I had previously posted. We didn't have any of the standard braising veggies (carrots & celery), so I took a shortcut which ended up paying off. I didn't think I'd be able to pull this off in time for dinner and somehow managed to get some tender results, so this is how I'm making this dish from now on if I can get away with it. I also made a gravy from the sauce, which was Ken's second favorite part (the tenderness being the first favorite). Many praises from Ken, which means this is a definite keep.
While the meat sits in the balsamic vinegar, add the beef stock, vegetable stock and port wine to the pan and bring to a boil, scraping off any meaty bits that got stuck to the bottom of the pan. Pour this liquid into the pan over the beef. Cover the pan with foil and place into the oven for about 2 hours.
For the gravy, start with a roux by melting the butter in the pan and mixing the flour into the melted butter. Slowly add about 1 cup of the braising liquid from the beef and stirring until you get your desired consistency. This should already have plenty of salt in it so you won't need to add extra. Add pepper to taste, if desired.
The beef should be tender enough to cut with a fork. I served this with smashed potatoes flavored with 2 pats of butter and about 3 tbsp of creme freiche. The gravy is great with the potato. Also on the side were 3 baked beets, slightly salted, and a cabbage-shitake-egg stir-fry (yes, very random for this meal, but I needed to use up the veggies from our most recent box). This was so easy to do and a lot less effort than the last version. Let me know what you think if you make this!
- 2-3 full strips of boneless short ribs
- 1 cup beef stock
- 1 cup vegetable stock
- 1 cup port wine
- about 2-3 tbsp balsamic vinegar
- 1 tbsp cooking oil
- 1 tbsp unsalted butter
- 1 tbsp flour
While the meat sits in the balsamic vinegar, add the beef stock, vegetable stock and port wine to the pan and bring to a boil, scraping off any meaty bits that got stuck to the bottom of the pan. Pour this liquid into the pan over the beef. Cover the pan with foil and place into the oven for about 2 hours.
For the gravy, start with a roux by melting the butter in the pan and mixing the flour into the melted butter. Slowly add about 1 cup of the braising liquid from the beef and stirring until you get your desired consistency. This should already have plenty of salt in it so you won't need to add extra. Add pepper to taste, if desired.
The beef should be tender enough to cut with a fork. I served this with smashed potatoes flavored with 2 pats of butter and about 3 tbsp of creme freiche. The gravy is great with the potato. Also on the side were 3 baked beets, slightly salted, and a cabbage-shitake-egg stir-fry (yes, very random for this meal, but I needed to use up the veggies from our most recent box). This was so easy to do and a lot less effort than the last version. Let me know what you think if you make this!
Monday, August 8, 2011
Sole with Lemon-Butter Sauce

- 1/2 cup dry white wine
- 8 sole fillets
- 16 very thin lemon slice (from 1-2 lemons), seeds removed
- juice of 1 lemon (3 tbsp)
- 3 tbsp cold butter, cut into pieces
Bring the wine to a boil; reduce the heat to medium-low. Cover; simmer gently until the fish is opaque throughout, 3-5 minutes. With a spatula, transfer the fish to serving plates.
Return the liquid in the skillet to a boil; cook until reduced to 1/4 cup. Add the lemon juice; remove from heat. Whisk in the butter until smooth. Season with salt; strain if desired.
Friday, August 5, 2011
Braised Beef Short Ribs

This was so easy to make and so delicious. I got the idea for this from the French favorites episode of "Best Thing I Ever Ate". We don't have a Dutch oven but do have a crock pot, which actually works quite well because it has a timer and doesn't need to be watched, making this even easier to cook.
- 2 strips center cut beef short ribs (with or without bones)
- 1/2 chopped onion
- 1/2 cup chopped carrots
- 1/2 cup chopped celery
- 1 cup port wine
- 1 cup red wine
- 2 cups beef stock
- salt, pepper, thyme, bay leaves
- 1/4 cup balsamic vinegar
- 2 tbsp extra virgin olive oil
I made a gravy with the braising liquid by first making a roux then adding the liquid, stirring until a smooth consistency. You can also make a sauce by straining the liquid into a saucepan, skimming the fat, and reducing until thickened (about 10 minutes). Remove from heat and whisk in 1 tbsp of butter.
Oh, I also made a wasabe yogurt dressing to go with it. It's a twist on the horseradish cream (I assumed sour cream) from the show, but I didn't have either so just went with what I had. The flavors are pretty similar. Basically, I combined wasabe paste with nonfat Greek yogurt. Remember that a little wasabe goes a really long way! This is a nice balance with the gravy. Mmm!
Subscribe to:
Posts (Atom)